Hi all! We design and 3D print a lot of things, using open-source software: meaning you can do it yourself too!
In this blog we will show you the basic steps in the process of creating a model and and print it! We will use the free software Blender to design our model and the free software Cura to slice the model and send it to the printer. Don't worry, you do not need any experience in Blender to follow the steps in this post!
STEP 1: Start Blender
First, let's start the software Blender. The default opening screen starts with a camera, a cube and a light:

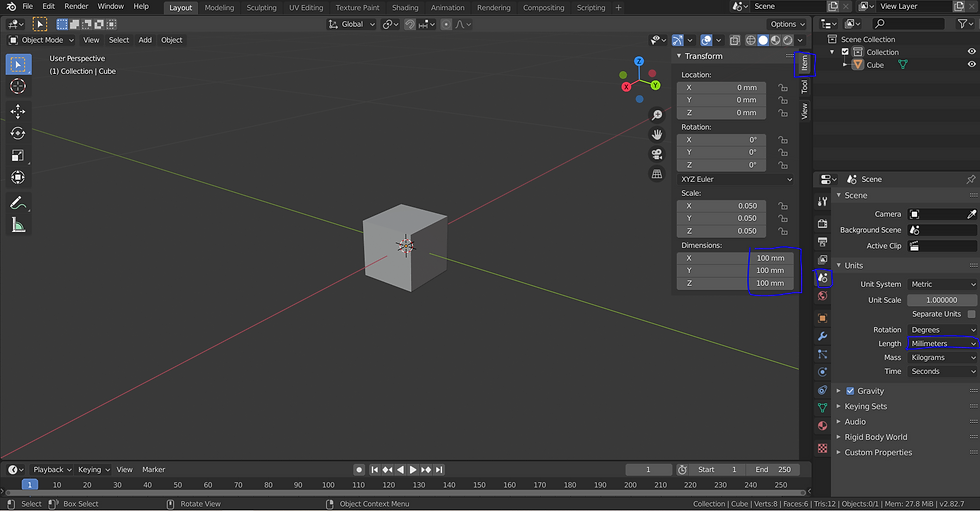
By clicking on the light and the camera and pressing delete, you can delete them since we won't need them for creating a printable model. Personally, we like to work with the units [mm] and in this example the cube size set to 100 [mm], see the figure below.

STEP 2: Draw your model
Use your awesome creative modelling skills! First time to Blender? There are tons of tutorials available on YT!
STEP 3: Export to STL
Go to file -> Export -> STL and save on your computer. That's basically it. Your 3D model is converted to a STL file.
In the example below we drew this cool looking spirit horse and exported it.

Important:
Keep in mind that if you export your file as STL, attributes/properties of the geometry in Blender will be gone. You can see this clearly when you import your exported STL in Blender and press tab on the object, for example see the default cube surfaces on the right picture. On the left picture this cube is exported and then imported. As can be seen, divisions are added by exporting to STL and therefore the attributes are not the same. Also the history of geometric modifications (like modifiers etc) will not be saved when exporting to a STL file. Therefore, always make sure you always save your file as a .blend file, so you can continue working on that model at anytime.


STEP 4: Import STL model in Cura and print
The last step is simple, import the just exported model in Cura:

And that's it, well done, you now know the very basics of how to create and print your own model!
P.S. In the end, the spirit horse became part of a chess box!


Σχόλια